
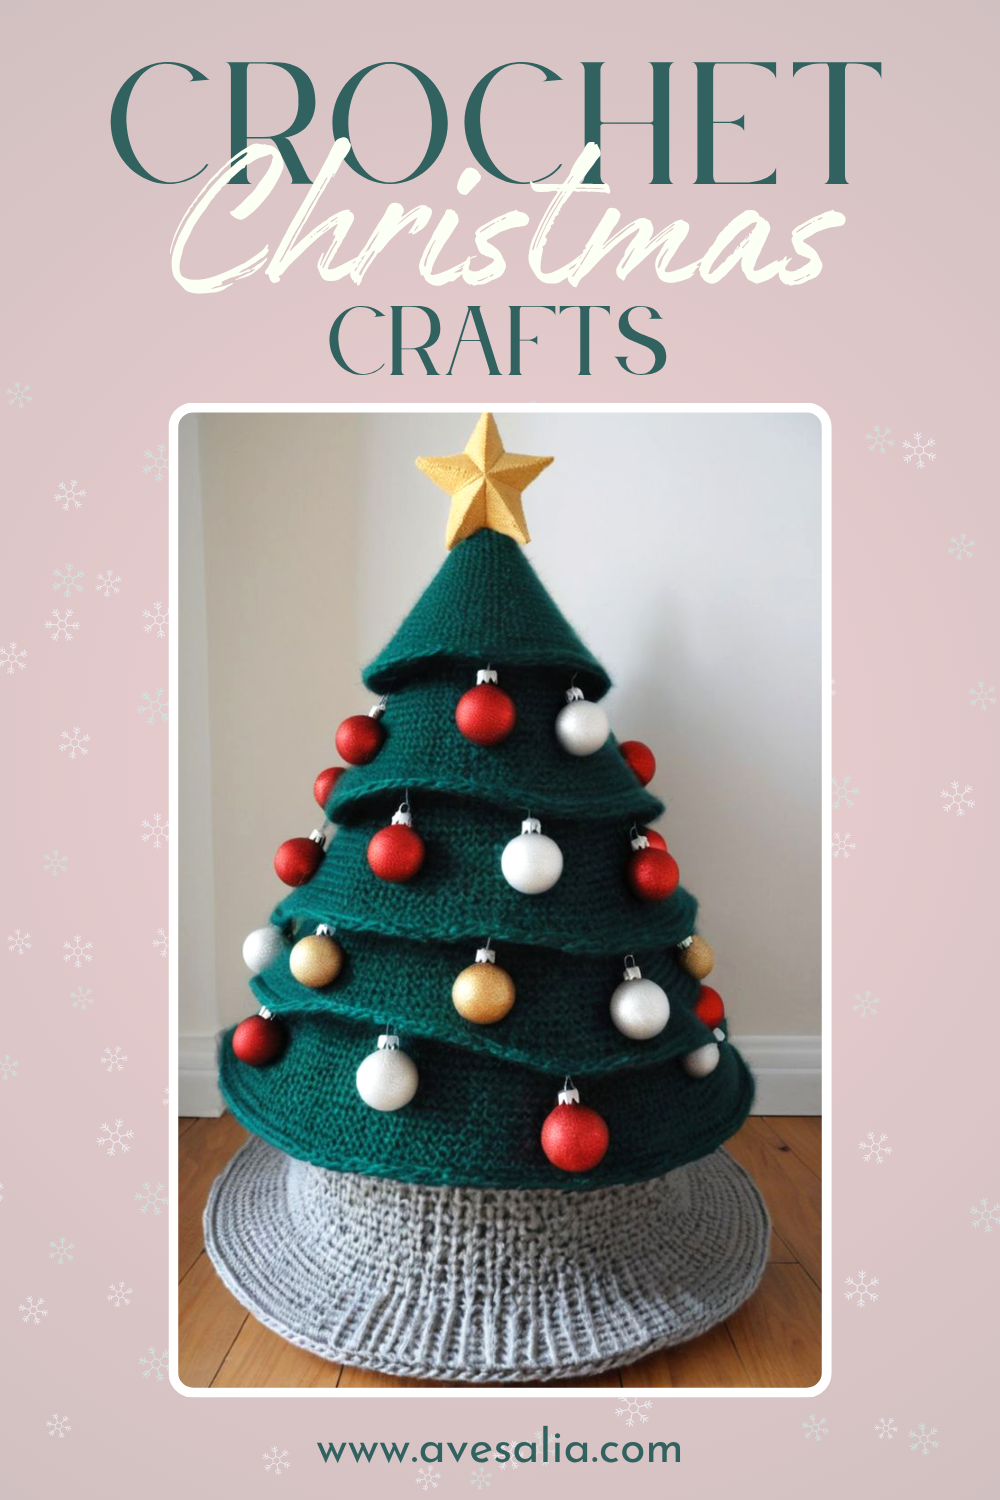
Learn how to make a stunning DIY crochet Christmas tree with this step-by-step guide. Perfect for holiday decor, this cozy handmade craft adds warmth to your home—ideal for beginners!


Step-by-Step Guide to Crocheting Your Christmas Tree
Create your own charming crochet Christmas tree with these simple steps:
1. Create the Base: Start with the red yarn. Crochet a flat circle using a magic ring, working in single crochet (sc) stitches. Increase stitches in each round (e.g., 6 sc in ring, 12 sc in round 2, 18 sc in round 3) until you have a sturdy base about 4-5 inches wide. Fasten off and weave in ends.
2. Form the Tree Tiers: Switch to dark green yarn. Begin with a magic ring and crochet in continuous rounds. Increase stitches to create a circular base for the first tier, then work even rounds to shape it into a slightly curved disc (about 6-8 inches wide). Stuff lightly with fiberfill. Repeat this process, decreasing the size of each tier (e.g., 5 inches, 4 inches, 3 inches) as you stack upward, creating a conical shape. Use a stitch marker to track rounds.
3. Attach the Tiers: Sew each tier to the one below it using the yarn needle, stacking them from largest to smallest. Ensure the stuffing holds the shape without overfilling. The tiers should overlap slightly for a natural tree look.
4. Add the Topper: Crochet a small yellow star using a simple pattern (e.g., 5-point star with double crochet [dc] points). Attach it securely to the top tier with the yarn needle.
5. Decorate with Ornaments: Crochet or attach small baubles in red, gold, silver, and green. Use the yarn needle to sew them onto the tiers, spacing them evenly for a balanced look. Alternatively, use tiny store-bought ornaments with thread loops.
6. Finalize and Display: Weave in all loose ends. Place your tree on the red base and adjust the tiers for symmetry. Your DIY crochet Christmas tree is ready to shine!
Styling Ideas for Your Crochet Christmas Tree
This charming and versatile decoration can bring a festive touch to almost any holiday space:
- Tabletop Centerpiece: Place your crochet tree on the dining table surrounded by candles, pinecones, or small festive figurines to create a warm and inviting glow. Its handmade texture adds a personal touch to your holiday meals.
- Mantel Accent: Position the tree alongside stockings, garlands, or string lights for a rustic, cozy vibe. It pairs beautifully with natural elements like pine branches or wooden ornaments for a traditional holiday feel.
- Gift Display: Use your crochet tree as a unique base for wrapped presents. Small ornaments or handmade decorations can double as tree toppers, adding layers of charm to your gift presentation.
- Window Sill Charm: Set the tree on a window ledge and surround it with fairy lights or miniature holiday props. The soft glow creates a festive atmosphere both inside and outside your home.
- Holiday Shelf Decor: Combine your crochet tree with other handmade crafts, such as knitted figures, candles, or seasonal figurines, for a curated and visually appealing holiday shelf display. It’s perfect for creating a layered, cozy look throughout your home.
Creative Variations to Try
Make your crochet Christmas tree truly one-of-a-kind with these fun ideas:
- Color Swap: Experiment with different yarn colors—white for a snowy, wintery tree, or multicolored yarn for a playful, festive vibe. Metallic or glitter yarns can also add a magical sparkle.
- Texture Play: Incorporate ribbed, cable, or bobble stitches into the tiers to give your tree extra dimension and tactile interest. These subtle details make your crochet tree stand out as a handmade work of art.
- Mini Version: Create smaller trees with 2–3 tiers to use as stocking stuffers, tree ornaments, or tabletop accents. These tiny versions are perfect for gifting or decorating compact spaces.
- Embellishments: Sew on tiny bells, beads, or felt snowflakes to add charm and personality. You can even mix textures, like felt stars with metallic beads, for a whimsical touch.
- Themed Ornaments: Customize your baubles to match your holiday color scheme—blue and silver for a winter wonderland, red and gold for a classic Christmas, or pink and green for a fun, modern twist.

The Joy of a Handmade Holiday
There’s something truly special about a DIY crochet Christmas tree—it’s more than just holiday decor; it’s a labor of love. Each stitch, every carefully stacked tier, and every personalized embellishment adds a touch of warmth to your home that store-bought decorations simply can’t match. Whether you craft it on your own, enjoy the process with family, or make it as a heartfelt gift, this project has the power to become a cherished holiday tradition.
Beyond its sentimental value, a handmade crochet tree is eco-friendly and reusable, evolving with your style year after year. It’s a sustainable choice that brings charm and personality to your holiday celebrations. So pick up your hook, choose your favorite yarn, and let the festive crafting begin—your handmade tree is ready to fill your home with warmth, cheer, and a little holiday magic.
Frequently Asked Questions (FAQs) About DIY Crochet Christmas Trees
Q: What crochet skill level is needed for this project?
A: Beginner-friendly! Basic stitches like single crochet and increasing rounds are all you need—tutorials are widely available online.
Q: Can I use different yarn weights?
A: Yes, but adjust your hook size (e.g., use a larger hook for bulky yarn) and expect size variations in the tree.
Q: How long does it take to crochet a Christmas tree?
A: About 2-4 hours, depending on size and experience—perfect for a weekend craft session.
Q: How do I clean my crocheted tree?
A: Spot clean with a damp cloth; for deeper cleaning, hand wash gently and air dry flat to preserve shape.
Q: Can I add lights to the tree?
A: Yes! Use battery-operated fairy lights woven between tiers, securing with small stitches to avoid damage.


